Bending wood for cabinet making

beviking

Senior Member, Sophomoric Attitude
Feb 16, 2002
2,550
0
36
55
Syracuse, NY
Thought I'd ask if anyone has x.p. on steam bending or laminating pcs. for building a cabinet with a curved front.
Looking at steam bending 1X4's (ash,maple) for the top/bottom rail of the frame for a 92gal corner tank.
Also looking at laminating pcs. to get the desired thickness but unsure if the pc will hold up to the pressure/time equation. There will be a 3/4" plywood top over it.
Anyone?
 
Sorry to hi jack this

Just got my cherry shrimp from you in the mail
they are so cool thanks

carry on
 
no experience personally, but I saw on the new yankee workshop a tiered plant stand made with quarter round ends. He made a wood form with notches for bar clamps that he bent multiple thin lengths over with glue to form his curved supports.

http://www.newyankee.com/getproduct3.cgi?0403

That is the stand, don't know if haveing the plans would help your idea or not.
 
Great BUCKEY! Hope you'll leave good feedback ;)

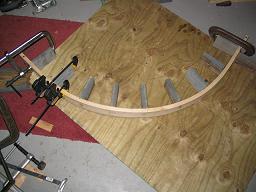
Thanks for the link Snake! Yeah, that's how they do it. Make the mold, bend pcs around it and glue/clamp, let dry, viola. The good folks over at woodworking.com forum have helped out alot! Seems to be the easiest way to go... but to build a steamer and bend solid wood...oh the testosterone I would exude just from accomplishing such a feat!!!! :joke:
I'll be sure to share the project once I make up my mind as to how I'm going to do it!
 
You put that so eloqently, but I still am hearing Tim Taylors version. Ough Ough Ough...
 
I high school wood shop I made multiple ships with bent plank hulls, some as large as 4 foot long. The trick is heat and soak time. The wood has to be fully saturated, and hot clear through. With anything thicker than about 1/4 inch steaming is tough, a turkey frier full of boiling water however will do nicely. Soak your wood to be used for a couple of days to ensure it is waterlogged, and then put it in the boiling water for adequate time to fully heat it. make sure your jig and clamps are ready (or fasteners if you plant to assemble as you bend) and start cooking. Once the wood is really good and hot bend it and clamp it it will hold it's form when it cools. I have helped make sled runners as thick as a couple of inches this way. It is more time consuming, but the testosterone thing you mentioned is worth it's weight in gold.

With thinner peivces of wood, I used to soak them and use a steam iron to heat them. Picture a four foot long clipper with a bent plank mahogany hull.
Dave
 
Thanks for the reassurance! Ough Ough Ough!
I keep coming across plans for a DIY steamer (4"pvc, hot plate, radiator hose, kettle) and 1 hour per inch thickness of wood. Once I get my hands on the wood that hasn't been kiln dried, I'm going for broke!
But if I used 12"pvc, flame thrower and 55gal drum, I could bend the tree, then cut the lumber...Ough Ough Ough!!!
 
Que the theme music from the "Rocky" movie...

Can't find the pic of the steamer but it is just a 6' piece of 4" pvc, cap at one end, elbow with radiator hose leading out to a window, a short threaded nipple with a short piece of radiator hose leading to a tea kettle on an electric hotplate ($8 from Wally-world). Some trial and error but got 'er done!OUGH! OUGH! OUGH!

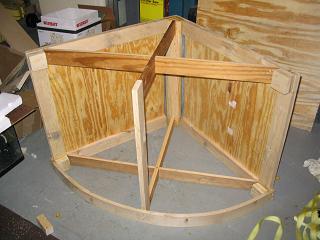
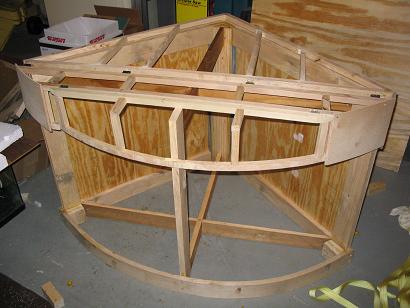
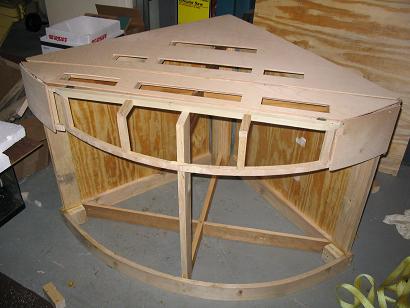
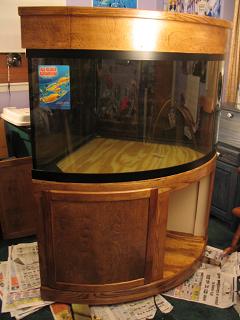
Some details...used ash lumber (was rough cut, cut it all down to size w/table saw), the "x" in the center top and bottom are pine, just there for spacing really, no support, the back corner is a 4x4 with a corner cut off so it's a triangle, most joints are glued and screwed together, some dowels and glue, the sides are 3/8 plywood with finish nails (the sides will essentially be against the walls so won't be seen but they'll get stained and poly'ed anyway). The floor and top will be 1/2" plywood. The holes in the top of the hood are for 2" wide soffit vents cut to length.

standframe.JPG hoodframe.JPG hoodskin.JPG Bentform.JPG
 
Last edited:
I can see a new product hitting Aquabid soon :clap: :clap:

Looks good Bill, Keep us posted as things progress.
Dave
 
Gettin' there....

I finally picked up the tank. I FINALLY got to a point where I saw an end in sight! I'm in the middle of painting the back (2 sides really) and thought I should take a pic. The one door is just resting in place, the other door is just to the left behind the stand...haven't put hinges on yet. I have two pieces of trim ready to go on that will cover the black frame at the top of the tank and bottom of the tank too. You're actually just seeing the front 2/3 of the hood sitting on top. I still need to make the corner trim pieces that will cover the corners of the tank itself. More to come...hopefully SOON!

cornertankstand.JPG
 
AquariaCentral.com