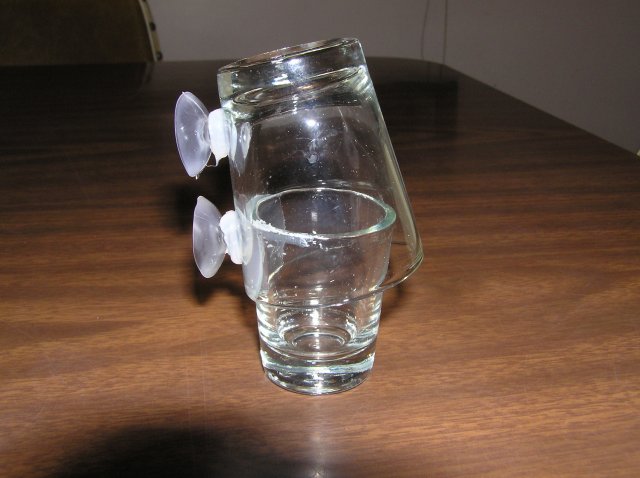
I decided to undergo the arduous and exhausting process of designing, engineering, and constructing a homemade CO2 drop checker. The process went something like this:
- Scrounge kitchen cupboards for something appropriate: 45 seconds.
- Discover two shot glasses, one of them half the size of the other: 1 second.
- Test liquid holding capacity of each by using for the designed purpose (My favorite part) : Filling took 3 seconds, emptying each about 1 second.
- Repeat liquid holding test of each in the interest of scientific accuracy: 4 seconds.
- Just to be sure, triple check liquid holding capacity (one can't be too careful with these things): another 4 seconds.
- Take a break for the evening. I wasn't about to get much more done that evening anyway. :dance:
- The next day, restart the process. Considered re-testing the liquid holding capacity but fortunately thought better of this. Washed, rinsed, re-rinsed, re-re-rinsed and thoroughly dried the shot glasses.
- Dig through kitchen junk drawer for tube of silicone and suction cups: 1 minute.
- Place glob of silicone onto side of smaller shot glass: 10 seconds.
- Push side of smaller shot glass onto inside of larger: 10 seconds.
Whew! This is getting exhausting, bear with me here.
- Push glob of silicone each of two suction cups and mash onto side of large shot glass: 20 seconds.
-Done!! Now to wait for the stuff to cure. Package directions say 24 hours to cure fully, so I wait 48. Total elapsed construction time: 2 minutes and 38 seconds. Needless to say, I was exhausted after this so I figured I'd better take the rest of the day to recuperate. Fortunately, I used up my shot glasses, otherwise the recuperation may have taken considerably longer.
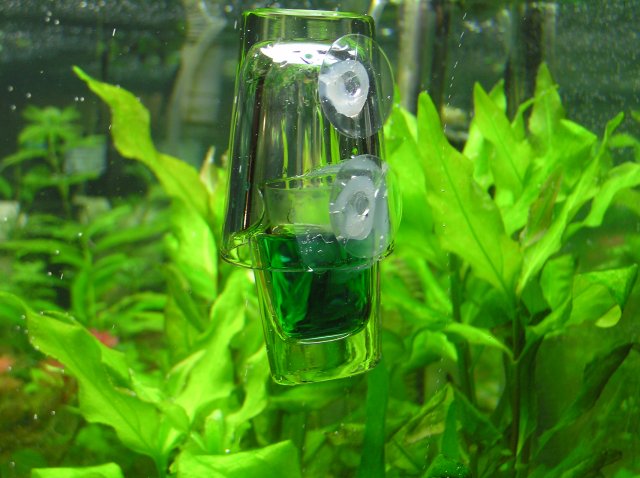
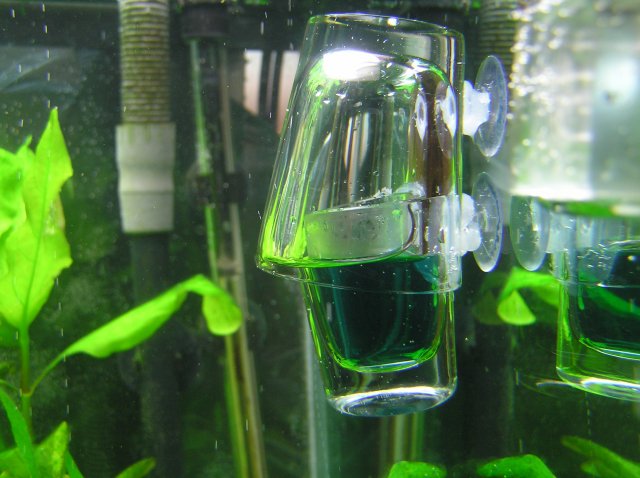
Here it is after construction and in action, with carefully prepared 4 Dkh water and some Regent. Regent is still blue as this shot is right after I stuck it on. We'll see how it does in a couple of hours.


- Scrounge kitchen cupboards for something appropriate: 45 seconds.
- Discover two shot glasses, one of them half the size of the other: 1 second.
- Test liquid holding capacity of each by using for the designed purpose (My favorite part)
- Repeat liquid holding test of each in the interest of scientific accuracy: 4 seconds.
- Just to be sure, triple check liquid holding capacity (one can't be too careful with these things): another 4 seconds.
- Take a break for the evening. I wasn't about to get much more done that evening anyway. :dance:
- The next day, restart the process. Considered re-testing the liquid holding capacity but fortunately thought better of this. Washed, rinsed, re-rinsed, re-re-rinsed and thoroughly dried the shot glasses.
- Dig through kitchen junk drawer for tube of silicone and suction cups: 1 minute.
- Place glob of silicone onto side of smaller shot glass: 10 seconds.
- Push side of smaller shot glass onto inside of larger: 10 seconds.
Whew! This is getting exhausting, bear with me here.
- Push glob of silicone each of two suction cups and mash onto side of large shot glass: 20 seconds.
-Done!! Now to wait for the stuff to cure. Package directions say 24 hours to cure fully, so I wait 48. Total elapsed construction time: 2 minutes and 38 seconds. Needless to say, I was exhausted after this so I figured I'd better take the rest of the day to recuperate. Fortunately, I used up my shot glasses, otherwise the recuperation may have taken considerably longer.
Here it is after construction and in action, with carefully prepared 4 Dkh water and some Regent. Regent is still blue as this shot is right after I stuck it on. We'll see how it does in a couple of hours.


